Wet Looking Materials
By Neil Blevins
June 11th 2002
What makes a material look wet? Or gooey, for those of you who love to make slimy creatures.
Well, first, lets look at the problem at the most basic level. An object looks wet because the surface of the object has a thin sheet of water over top of it. So what makes water look like water? Water has no obvious diffuse component. It has a strong specular component (specular reflection), especially at glancing angles due to the fresnel equation. It is also refractive, although since the sheet of wetness is so thin, the refractive component can be neglected unless we're really close to the surface. So in fact, the main feature that makes up water in this case is it's reflective properties.
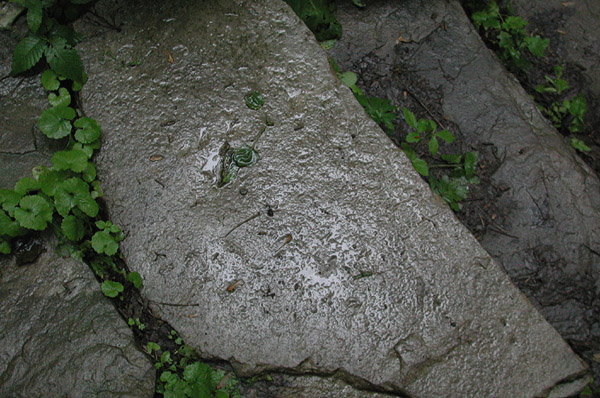
If you look at these rocks, you can see the diffuse component of the rock, and over top you can see nice sharp specular reflections of its environment (slightly distorted by the bumps on the rock). Since this rock in its natural state would have almost no specular reflections, the viewer, upon seeing the rock, would assume it to be wet. It's always easier to make something look wet if the object has no specular component to begin with.
图片如下:
As discussed in previous tutorials, a specular reflection can be either a true reflection of your environment (either an environment map or raytraced reflections), or a cheat such as a blinn or phong highlight. If your object just needs to look wet, and you don't need accurate reflections, you might be able to get away with a blinn highlight. Water is very reflective and it's surface is quite smooth, hence any blinn highlight should be strong and sharp. So if your original shader has no highlight, just add a strong and sharp highlight to it as the first step in making the surface look wet.
But what happens if your surface already has a highlight? Well, one thing you can do inside 3dstudio max is apply a Shellac material to your object. Shellac lets you apply a second material to your first material in an additive fashion. It's great for layering highlights. So for example, try getting Blur's HighlightOnly (http://www.blur.com/blurbeta/) Material. This is a material that does what you'd expect, it's a highlight only, with no diffuse component, and works great in shellacs. So slot 1 of the shellac is your original material. Slot 2 is a HighlightOnly material. Adjust the shellac value to something between 100-200%. Go into the HighlightOnly material and make a strong and sharp highlight, which will be the highlight from the water. One last thing to note, if using a shellac, the HighlightOnly material will not be affected by the bump map from your slot 1 material. This can be useful in some situations, like with a coat of varnish on wood, the varnish would usually not inherit the bump from the wood, but have it's own type of bump. But in the case of a thin sheet of water, the bump map on your original material should probably affect the highlight of the HighlightOnly material, so place in the bump map slot of the HighlightOnly material the same bump map that's affecting your material in slot 1. Maybe reduce the HighlightOnly's bump map's intensity slightly, depending on how the effect looks. Now apply the shellac material to your object.
图片如下:
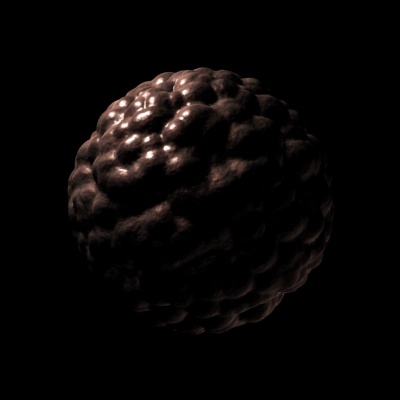
Here's a max file that made the image above, max3: wet_material.zip (16K) You'll need HighlightOnly for this file, as well as Blur's Utility Material. I use the Utility material because Shellacs don't allow to use of a displacement map. So by placing the material in a Utility Material, I am able to add the displacement map to the material.
Other details to consider, when an object becomes wet, the water tends to seep into the surface, usually discoloring it. For example, a light dirt will become a deeper brown, or grey concrete will drop a few shades. The rocks in the photos above were certainly lighter before water started collecting. So your base material may need to get a little darker in order to complete the effect, especially if you see the material somewhere else where it is not wet. Go take a look at some real world examples to help inform you on which kinds of materials get darker when they get wet.
--------------------------------------------------------------------------------
This site is ©2002 by Neil Blevins, All rights are reserved.
Back to NeilBlevins.com


